Simple Bow Silhouette Cut File

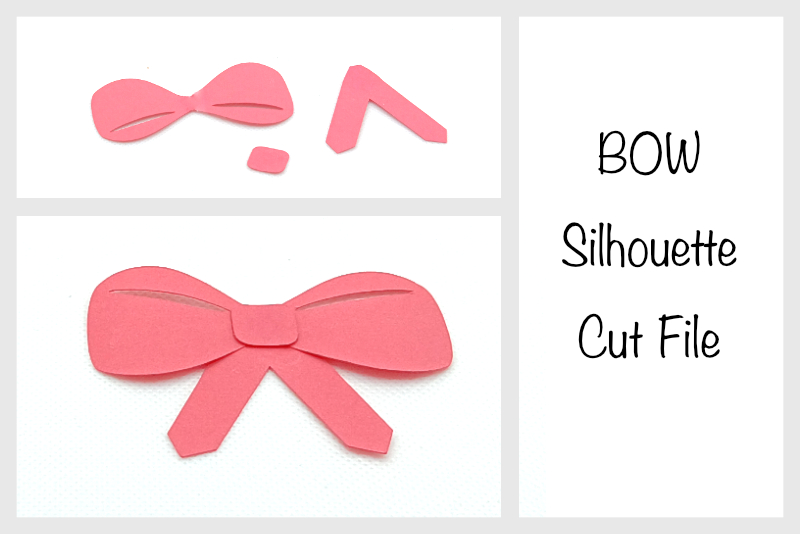
In this Silhouette Studio® tutorial, we will create a bow, using the software's Flexishape feature. We will design a simple bow that can be a detail for any holiday or special occasion project. Open Studio and let's get started.
Silhouette, Silhouette Studio, Silhouette Connect, PixScan, Silhouette CAMEO and Silhouette Portrait are either registered trademarks or trademarks of Silhouette America, Inc. Product screen shot(s) reprinted with permission from Silhouette America®, Inc.
- In the Page Setup panel, set the Machine to Cameo 5, Feed Type to Auto/Manual, Cutting mat to Cameo and Media Size to the size of your paper for the bow (see screenshot).
- In the Flexishape panel, select the tear drop shape (fifth row and sixth from the left). Draw a horizontal tear drop, about 2 inches long and with the point facing to the left (see screenshot).
- Right-click the tear drop shape and choose Convert to Path.
- Double-click the shape with the Select tool, to see the anchor points and select the Edit Points tool.
- Remove the point furthest to the right, to flatten the oval shape (see screenshot).
- With the shape still selected, click the Select tool. Next, click the Duplicate icon in the Quick Assess Toolbar. Right-click the duplicate shape and choose Flip Horizontally.
- Drag the shape to the left side of the first bow shape. Overlap the two pointed ends (see screenshot).
- Select both shapes. From the Quick Assess Toolbar, click the Weld icon to form one shape.
- With the Ellipse tool, draw a flat oval cut line at the top edge of one side of the bow. Rotate the oval slightly to match the angle of the top edge of the bow (see screenshot).
- Duplicate the oval shape, flip horizontally and place it at the top edge of the other side of the bow.
- Select the bow and the two oval shapes. Click Object - Group from the top menu.
- From the Flexishape tools, select the last tool in the first row. Draw one tail (see screenshot).
- Duplicate the first tail, flip it horizontally and place them together below the bow shapes (see screenshot).
- Overlap the top edges of the tails. Weld them together.
- Double-click the tails to see the anchor points. Remove some of the points to round the top of the tails (see screenshot).
- Select the Rounded Rectangle tool and draw a rectangle that is about .5 x .5 inch, which will cover the center of the bow (see screenshot).
Let's reshape the tear drop in to a bow.
Once you have the parts of the bow formed, let's add a fold to the bow.
Now we will draw the two tails for the bow.
There is one last piece to the set of cutting lines. That is the small rectangle that will cover the center of the bow.
- From the top menu, click File - Save As - Save to Library.
- Click File - Save As - Save to Hard Drive.
- Select all cutting lines.
- From the top menu, click File - Save Selection - Save to Hard Drive
- Set the export file type to SVG.
- Place the bow on to the tails, matching then in the center.
- Glue them in place.
- Add the small rectangle over the center of the bow. Use a form dot under the rectangle, to add dimension to the bow.
Silhouette, Silhouette Studio, Silhouette Connect, PixScan, Silhouette CAMEO and Silhouette Portrait are either registered trademarks or trademarks of Silhouette America, Inc. Product screen shot(s) reprinted with permission from Silhouette America®, Inc.

Related Articles
Editor's Picks Articles
Top Ten Articles
Previous Features
Site Map
Content copyright © 2023 by Diane Cipollo. All rights reserved.
This content was written by Diane Cipollo. If you wish to use this content in any manner, you need written permission. Contact Diane Cipollo for details.


